The Woodwork
With this being a very involved process so I thought I could enlighten others as to the process of woodwork rejuvenation.
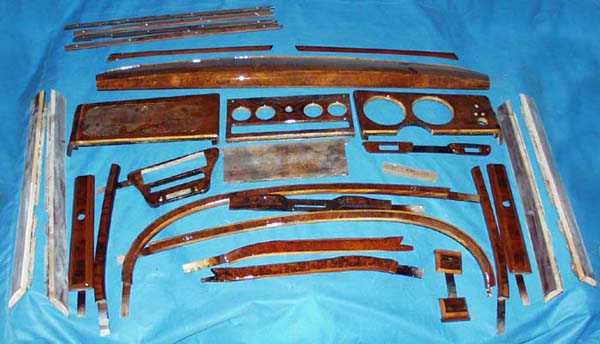
There is a lot of wood in a 68 S-type we’re also going to add
MK10
picnic tables and wooden steering wheel.
When it arrives the timber is assessed for it’s condition. My timber is in what Rob Brewer classes as good condition, only requiring a couple of very small areas reveneered and some splitting repaired in the map table. In this regard I am lucky as some of the timber presented for his service requires many repairs to the timber substrate and complete reveneering.
 |
Wood veneer comes as wafer thin sheets |
The next stage is the first of many sanding operations, this time to remove
the old lacquer and worn veneer. A large amount of this process is performed
by hand and with the quantity of timber in an S-type takes many days.
Repairs are then made and with gluing, shaping of new parts and drying this
process takes many weeks with only small sections able to be completed at a
time, then more sanding.
New veneer is then applied using specialised adhesives and thin sheets of
walnut and other veneers. This is then trimmed and again sanded.
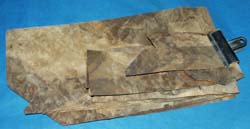
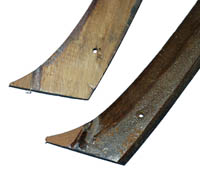
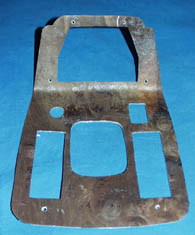
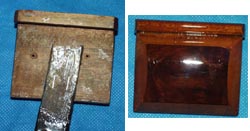
| Quite often repairs have to be made to the substrate timber pieces to repair chips, cracks, rot and broken pieces. The piece on the right also illustrates how badly worn the veneer can be. |
 |
 |
 |
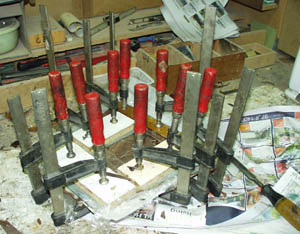
| Gluing and Clamping | After gluing and trimming before sanding and lacquer is applied, this piece is laminated stainless |
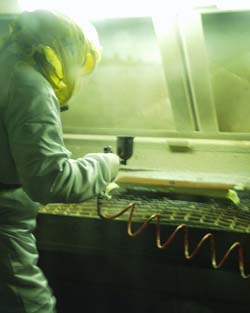
The new lacquer is applied using spray equipment, with sanding between coats and then drying, taking care not to get any dust in the mix. More sanding, polishing and painting the edges complete the process.
 |
 |
|
Rob applying the 2-pac lacquer in Smaller components have “handles” attached
|
With all the labour and drying that goes in to the work the whole process takes at least 6 weeks. By getting mine there as one of the first things I did it has made it much easier for Rob as there is no rush required. Watching the refurbishment I have been able to see the care and time that goes into the work, it will be lovely back in the car
 |
|
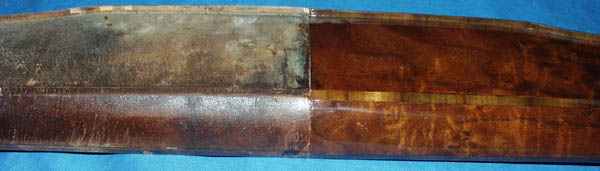
Before .............. and ............ After |